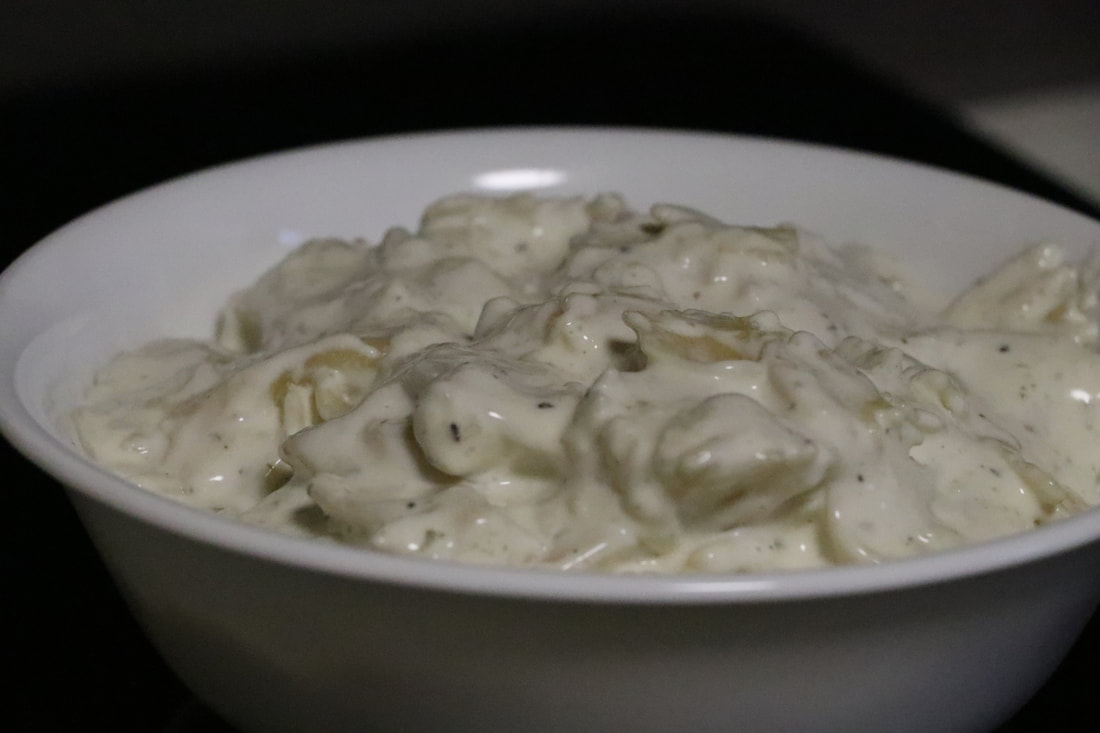
 After making Alfredo Sauce, we realized the bottom of our Ace Plus Blender by Instant Pot was terribly burned. Mr. Like it kept threatening to take it apart and claims it's the blenders biggest downfall. Can I get it clean?
WHAT TO EXPECT |
This daunting task looked glum and Mrs. Like It was terrified Mr. Like It was gonna take her new blender apart. After trying multiple things, she finally got it clean by putting some water in there with a Finish Powerball Max 3 In 1 Dishwasher Detergent. She set the cycle to Soup and let it come to temp. Then she pressed the clean button. She left it sitting over night, but found out later that step wasn't necessary after burning the blender a second time. Mrs. Like It poured out the nasty water the next morning and then did a regular clean cycle to make sure it was clean. While frustrating, we are glad there is a solution to clean the blender.
As a side note, we intended to do an episode on trying different things. However, we've only burned the blender twice and came up with the idea after the second burning. We purchased different dishwasher solutions to try, but haven't had the opportunity to try any of them out because we've learned to add dairy in last and another tip given by a commenter was to spray Pam (or non stick cooking spray of your choice) inside the bottom of the blender prior to putting in your ingredients to help prevent it in the first place. 
THINGS USED IN THIS VIDEO |
HINDSIGHT | We also have a theory that someone could use puree and just let that cycle run and that way you could just walk away from the blender while it did it's job and come back later to a rather disgusting mess, but in theory it shouldn't be stuck on the blender anymore. BEHIND THE SCENES | We used a Canon 80D to film this video. We used Open Shot Editor for editing the film together. We used Canva to create the captions & cards within the video. We most likely did use TubeBuddy to help create this thumbnail along with a print screen, the remove background website and canva. This video released onto our YouTube channel on July 6, 2020 NOTES FROM MRS. LIKE IT | It was an unexpected awful surprise when the sauce that tasted so good burned the bottom of my blender. The mood went from ecstatic to horrified in the blink of an eye because Mr. Like It was ready to tear the blender apart or worse return it. It took me a LOT of tries and my last try was my last shot to get it clean. The video is on the longer side because we did want to show all of the tries we got on camera. We also wanted to show how the deep clean step suggested in the manual did not work as stated. Mr. Like It still finds this the biggest flaw of the blender in regards to difficulty cleaning. Sure it's cumbersome and a pain, but at least we have a solution for when we burn something in it. Hope you found this video helpful if you've found yourself into a situation where your spouse is threatening to take away your blender that cooks.
0 Comments
 Mrs. Like It found an Alfredo Sauce Recipe from the Instant Pot Website that looked simple enough. Can she make it or did she challenge herself too much? Does the Instant Ace Plus Blender actually make it easy to make Alfredo Sauce so you don't have to stand by a hot stove? Are there any down falls to making it in the blender? Let's find that out. Plus a bonus | Pasta with Alfredo sauce
WHAT TO EXPECT AND VIDEO |
TOOLS AND INGREDIENTS |
HINDSIGHT | It was too thick in hindsight, but even at it's thickest form Mr. Like It loved it. We could have possible added more liquid to the blender to thin it down in there instead of taking so much time with the pasta trying to thin it down. It was still one tasty bowl of alfredo pasta sauce because Mr. Like It scarfed the full amount down in a couple of days. PS: In the butter, there was a fleck of pepper. It drives us bonkers, but it all went into the same pot soooo there's that. CLEANING | The downside of this dish is that it is full of dairy products which we found out afterwards burn onto the bottom of the blender. There are a couple of ways to prevent this. Someone suggested using Pam (or other non stick spray of choice) to spray onto Blender bottom FIRST prior to putting in the ingredients for the Alfredo Sauce. Someone else suggested leaving the dairy until last, but with this recipe the main part is the whipping sauce so not sure how that could be possible. We had to experiment with different ways to deep clean it. That video will be featured here on the kitchen page by 10/7/2020, but it is already on our YouTube Channel. We wanted to share you the product we found after trial and error in this post as well. Finish Powerball Max N 1. Now we've heard from multiple sources that other dishwasher tabs work just as well and had planned to do an episode trying different options including dishwasher liquid, but after purchasing those products we have managed to keep our blender nice and clean without burning it. Go Figure. BEHIND THE SCENES | At this point, we were still using a lot of transition cards. We still use some transition cards, but reduced the amount of transition cards & captions over time. This video might have been the first video where we utilized a "freeze" screen. Sometimes Mrs. Like It looks at the view finder instead which is a big oops. If we were filming & editing this today, we would have made a few changes. We would have made this a two part episode so that some of our actual cut scenes not even in cut scenes could have been included. Music (since we know what we used we are going to share what we used). We used music from the YouTube Library and used three music segments - Get Tough, After You & If I had a Chicken. Unintentional Cut Scene Shout Out - We gave a shout out to YouTube Channel Lizzie & Melanie because we know they use a lot of Garlic. It was completely unintentional and didn't make sense in the video, so included it in the cut scenes b.c it made us laugh so hard after I said it. It may or may not have been our first Supernatural reference as well. Technical Info | We used a Canon 80D to film this video. We used Open Shot Editor for editing the film together. We used Canva to create the captions & cards within the video. We may have used Tube Buddy for the thumbnail along with Canva (can't remember since this was created back in June 2020). This video debuted on Like It Or Not YouTube Channel on June 29, 2020. NOTE FROM MRS. LIKE IT | This is one of my favorite creations from Season 1. I think it was simply because it shocked me at how much my husband loved it. He was doubtful prior to the recipe that it would be good enough or beat the can version so imagine both our surprise when he said, "Dang that's good" after getting a swipe of some from the counter with his finger.  Two Superfood Smoothies was the third thing Mrs. Like It Or Not attempted to make in the Instant Ace Plus Blender. There were multiple issues, but overall it went okay. WHAT TO EXPECT FROM THE VIDEO |
FIRST SMOOTHIE | The first attempt involved a myriad of mistakes. First thing that went wrong is that there were no frozen peaches at the store. Mr. LION brought home canned peaches that we froze for the second smoothie, but for the first attempt we didn't have any. We used frozen blueberries instead. We had a plethora of them, but they were very old. This might have resulted in the not so great taste.
The second mistake was using at least 1/4 cup too much almond milk. Mrs. LION accidentally put in 2 and 1/2 cups instead of 2 and 1/4 cups. The first attempt was too runny and the greens weren't blended enough for our liking. Thus resulting in Mr. LION asking can Mrs. Lion never make this again. SECOND SMOOTHIE | In an opposite turn, there was not enough liquid to the amounts of frozen fruits put in. This attempt included the frozen peaches plus 4 extra ounces of frozen mango. Stems were removed from the Kale in attempt to help with the taste. KEY COMPONENTS & INGREDIENTS|
HINDSIGHT | Like It Or Not used the recipe on the Instant Pot App. The recipe is called the Ace Blender Super Food Smoothie. The first issue is that Ace Blender and Ace Plus have different programs within their blender. We didn't realize that until we made our first soup from the app. We prefer for our smoothies to be very smooth. We've solved the not smooth enough for us smoothie issue by running the cycle twice. The first cycle we run for whatever greens and milk (or milk substitute like almond milk). We start adding frozen and other ingredients during that first cycle to hopefully get near to the close consistency that we like by the end of the first cycle. Finally we run the cycle again to get it nice and smooth. If we need to add more frozen or more liquid we do that before we start the first cycle and pay attention to how it's doing. CLEANING | Cleaning from the smoothie isn't that difficult. All that has to be done is to pour water into the blender pitcher and then add a couple of drops soap. There is a clean button on the machine and that is pressed. Dump out contents into the sink. We prefer an additional wash other than that one cycle, but if you have to walk away at this point at least there isn't caked on food with the blender. However, we prefer to take our blender to the sink and set the heating element side on the dry counter while our pull down faucet is used to clean the inside again. Our preference is Dawn dish soap and it really is handy to have a pull down faucet. We have a mystery video from the kitchen coming in October and showing off our faucet might just very well be that video. OTHER INFORMATION | Mrs. LION was still a little uncomfortable with the camera, but through the journey of Can She Make it in the Ace Plus Blender she became more and more comfortable with her friend Canon 80D. The video is close to 14 minutes long and this is the first TASTE TEST Mr. Lion did. Our viewers get the idea of our humor in the kitchen for the first time in this one. We hope you enjoy the third episode of Season One: Can She Make It in the Ace Plus Blender. BEHIND THE SCENES | We used a Canon 80D to film this video. We used Open Shot Editor for editing the film together. We used Canva to create the captions & cards within the video. We most likely did use TubeBuddy to help create this thumbnail along with a print screen, the remove background website and canva. This video released onto our YouTube channel on June 22, 2020  Making Almond Milk in the Ace Plus Blender by Instant Pot is one of our more popular videos which is why we're featuring it as our very first favorite video of the week. This was only the second thing Mrs. LION made with this blender as it was something we knew we needed to know that the machine could make as we made it frequently with the Ninja 1100 Blender. We give the Ace Plus Blender 4 thumbs up for how it handled Almond Milk. It even came with a cute little nut bag for straining the milk out of the almonds. WHAT TO EXPECT |
INGREDIENTS|
KEY COMPONENTS USED DURING VIDEO|
* A coffee french press was attempted to use to separate the nut pulp from the "milk," but the blender did such a great job grinding up the almonds that it was impossible to use this method. MAKING YOUR OWN ALMOND MILK | Prep one cup of raw almonds in your Instant Pot. Mrs. LION used low pressure for not even one minute and then used the quick release. See below for more about what a time saver this is. Upon the pressure release, it's time to rinse off the almonds. We used a Chef'n Sift'n Sieve Flour Sifter and Sieve for our strainer and took the skins off. Taking the skins off is completely optional and can be a time saver if you don't feel like removing them. Just make sure you've rinsed off your almonds really well. Place your almonds into your blender. We use the Instant Ace Plus Blender with a Nut Oat Milk Button and put in 2 cups of filtered water. We prefer a 4 cup of filtered water to 1 Cup of Nuts ratio, but it's less messy to only use 2 cups to start. If you are ONLY wanting 2 cups, there is a step down below you will want to do before you start your blender. Press the Nut Milk Button and let your Ace Plus Blender do it's thing. Upon completion of the cycle, MRS. LION poured the almond water into the french press for separation. However, this technique failed because the blender does such a great job grinding up the almonds. The almond pulp & water we transferred to a nut bag. Squeeze all that liquid goodness out of the nut bag and into a container of your choice. We prefer Mason Jars at our house. Put your almond pulp into a separate container so you can turn it into Almond Flour later. Pour your Almond Milk back into the blender and add your preference of water (we add 2 more cups). Add in your optional ingredients (for us that's salt & honey, but you might prefer dates & vanilla). Do that step above should you only choose a 2 cup Almond Milk. Pulse it for another 30 seconds and then it's ready to pour into a mason jar to go into the fridge. SAVING TIME BY USING INSTANT POT| You absolutely do not need to use the Instant Pot to pressure cook your almonds for a minute. However, it's a huge time saver. What could take up to 24 hours only takes 10 minutes. Instant Pot (my specific model is DUO80, but any one would work -- you could even bring them to a boil on the stove instead, but for me the set it and forget it option for the instant pot for the almonds is worth it because I can get everything else ready while it's coming to low pressure) Another time saver is not removing the skins. You could simply remove them from the instant pot and give them a good rinse before throwing them straight into the blender. SIDE NOTE | This is Mrs. LION's first (and last) attempt using the French Press for pressing the Almond Milk, but the Ace Plus Blender does a tremendous job in making the Almond Milk. This is the primary reason we utilize a blender so it was very important for us to be able to make Almond Milk with it. This video also includes a bonus segment Can She Make in an attempt to make almond pulp crackers, but it was a big fat fail! BEHIND THE SCENES | We used a Canon 80D to film this video. We used Open Shot Editor for editing the film together. We used Canva to create the captions & cards within the video. We may have used Tube Buddy for the thumbnail along with Canva (can't remember since this was created back in June 2020). This video debuted on Like It Or Not YouTube Channel on June 15, 2020. ONE LAST THOUGHT | It was at this point in time that Mrs. Like It Or Not decided not to color her hair anymore. She was nearly 6 months into the process and there was no turning back. She was still a little uncomfortable with the camera, but through the journey of Can She Make it in the Ace Plus Blender she became more and more comfortable with her friend Canon 80D.  We began searching for a new blender during the spring of 2020. We finally settled on the Instant Ace Plus Blender back in June 2020. We got a great deal because we had previously ordered a Shark Vacuum and received some Kohl's cash from our purchase. It took off quite a bit of money from our Ace Plus Blender so we wound up only paying about $69 (in US). We realize this video is on the longer side, but we pack a lot of stuff in that 20 plus minutes. We tell the story of how we came across the blender and of course "it's a blender that cooks" came out of Mr. LION (like it or not) mouth a lot. We have a full unboxing of the video and even weigh the blender to let everyone know how heavy it is. We inspect the blender parts and note that it is not dishwasher safe due to the heating elements because it's a blender that cooks. In this first episode of Can She Make It, Mrs. Like It Or Not puts the blender through the first cleaning process and attempts to make home made applesauce by winging it. Our first taste test occurs and ultimately the applesauce winging it recipe was deemed not cooked enough and too liquidy. Ultimately, Mrs. Like It Or Not retries making applesauce again towards the end of Season 1 and makes corrections. We try to include cut scenes in most of our videos and the Ace Plus Blender Series is no exception. WHAT TO EXPECT |
TOOLS & INGREDIENTS IN THIS EPISODE |
Behind the Scenes | We used a Canon 80D to film this footage. We used Canva for creating captions. We used Open Shot (open source editing program) for editing the footage together. We have learned a lot about editing since the debut of Season 1 Episode 1. We aren't including the actual recipe configured from this video since it didn't work well, but the main purpose of this video was for the unboxing of the Blender That Cooks. We used TubeBuddy for helping create the thumbnail. This video debuted on June 13, 2020 on Our YouTube Channel.
|
Kitchen
The kitchen tab will feature in depth information about videos from our kitchen. Archives
|


 RSS Feed
